5 Ways to MAXMISE your training program

Without these your strength / training program will NOT yield best results, regardless of the style of training you use (Linear / Block periodization / Conjugated)

If you want to get more information on how to maximize your training / program simply fill in this form:

https://docs.google.com/forms/d/e/1FAIpQLSdXGw0T4DEf0-9R9sH-mMZy_PIcu2CRRxQD9Bx8dMWiyHLvYw/viewform


1: Volume (sets / reps)

This is the amount of work you’re doing each session / week / block of training.

So to ensure results this need to go up over time, the trade off is fatigue though, so don’t go to far to soon.


2: Intensity (load / resistance)

This is the load or resistance you’re using each exercise. For example 85% of your 1 RM is the intensity of that set. If you aren’t using the percentage of load then its simply the weight being used.


3: Progressive Overload

The key to progressive overload is progressing 1 variable at a time to get progress. This can be either

Volume (sets / reps)

Intensity (% of load, or resistance)

Frequency (how often you train)

Tonnage (Sets X Reps X Intensity)


4: Deloading

Specific times within your training program where all the above variables drop down so the sessions become shorter / easier. This is important for recovery and allows your body to adapt to the training you’ve been doing, which is important for strength and body composition.


5: Nutrition

Eating to support your training goals and your current level of training.

For example:

Gaining size: Calorie intake greater than energy spent daily

Dropping weight: Calorie intake Less than expenditure

Maintaining weight: Calorie intake matches energy expenditure


-Cam Burnside

If you want to get more information on how to maximize your training simply fill in this form:

https://docs.google.com/forms/d/e/1FAIpQLSdXGw0T4DEf0-9R9sH-mMZy_PIcu2CRRxQD9Bx8dMWiyHLvYw/viewform


STRENGTH & HYPERTROPHY FOR CROSSFIT / MULTI SPORT ATHLETES

Website: www.aplabs.com.au

Facebook: Ascension Performance Labs

Instagram: @ascension_performance_labs / @cam.j.burnside

2-crossfit_-str-hypertrophy

Interested in the full program?

Send our Facebook page a message to get ahold of it.

Are you;

crossfit athlete / olympic weightlifter or strength enthusiast that needs to put on some muscle mass?

This is a 2 week section of program that combines strength and conditioning principles using a Crossfit style format to allow the athlete to put some serious muscle size on.

In conjunction with the program the athlete will have be in a calorie surplus and consuming enough protein for maximal results (get the full layout of us for more details).

The reason this program has worked / will work for you

  • Total volume in conducive to muscle growth.
  • Intensity of weightlifting movements higher enough to develop maximal strength.
  • Significant amount of heavy Squatting / Pulling to increase hormone response.
  • Balance in pushing and puling movements.
  • Still combines /majority of areas for Crossfit / S&C performance.


Want the full layout and nutrition guidelines?

then Facebook message us @ascensionperformancelabs

W1D1

STRENGTH

Clean (x1) EMOM 10min

*Increasing load every minute, no misses.

Back Squat (x5) EMOM 5min

*~70%

Accessory Metcon:

5 ROUNDS FOR TIME:

Pull ups (weighted) x 6

Push ups x 12

BB Walking Lunge (front rack) x 7 each leg


W1D2

STRENGTH

PWR Clean (x3) EMOM 7 min

*Increasing load every minute, no misses.

Overhead complex EMOM 7 min

(Push press / Push jerk / Split jerk)

*pick a challenging weight and maintain it.

Accessory Metcon:

5 ROUNDS WITH 30 SEC REST BETWEEN EACH:

3 x Ring muscle up

5 x (moderate weight) push press

7 x (heavy) DB Row (2 arm)


W1D3

STRENGTH

Hang Snatch (x2) EMOM 10 min

Front Squat (x5) EMOM 5 min

*70%

Floating / Halting Snatch Deadlift

3 x 8 (heavy)

Accessory Metcon:

4 ROUNDS FOR TIME:

10 x DB Thruster

20 X Walking lunge steps

10 x Burpee


W1D4

STRENGTH

Snatch

Heavy single no misses (within 15 min)

Clean and jerk

Heavy single no misses (within 15 min)

Accessory Metcon:

Back Squat @ 75%-85% body weight

50 reps without re-racking the bar.

Rest 5 min

Push Press @ 50% 1 RM

50 reps for time.


W2D1

Strength

Snatch (x2) EMOM 10 min

*between 70-80%

Deadlift 5 RM

-10-15% for 2 x 5 on 90-120sec rest

Press 5RM

-10% for 3 x 5 on 60 sec rest

Accessory Metcon:

5 ROUNDS FOR TIME:

5 x Ring pull ups (weight vest)

10 x Push ups (weight vest)

15 x Box jumps


W2D2

Strength

Squat 5 RM

-10% 4 x 5

Clean (Blocks)

3 x 3

2 x 2

3 x 1

* Work up in weight as reps drop

DB Row

5 x 8

Accessory Metcon:

6 ROUNDS FOR TIME:

10 x KB swing

10 x GHD Situp

10 x DB Front rack lunge (heavy)


W2D3

Strength

PWR Clean Push Press 1 RM

-10% 5 x 1 EMOM

Push Jerk 2 RM

-10% 3 x 2 60 sec rest

Chest Supported Row

5 x 6

Accessory Metcon:

14 min EMOM

ODD: 5-7 x HSPU

EVEN: 10 x Pull ups


W2D4

Strength
Snatch

Heavy single no misses (within 15 min)

Clean and jerk

5 x 2 between 80-90% on 60sec rest

Front Squat 5RM

-10% 2 x 4

  1. Bench Press

5 x 5

  1. BB Row

5 x 5

Tricep extention with light band

100 reps


 Comment any questions or want to know more?

Want the full layout and nutrition guidelines?

then Facebook message us @ascensionperformancelabs

 horizontal_logo_print-ai-01

9 Week FREE Deadlift Program

Website: www.aplabs.com.au

Facebook: Ascension Performance Labs

Instagram: @ascension_performance_labs / @cam.j.burnside

9-week-deadlift-program

High Volume – Low Frequency;

1 x per week  (Cube Style) deadlift cycle

Are you;

A crossfit athlete / olympic weightlifter or strength enthusiast that needs a bigger pull / deadlift?

Below is 9 weeks of deadlift training we designed utilising a structure made popular by Brandon Lilly (Cube Method) which uses principles of;

1 x Heavy day, 1 x Speed (light) day, 1 x Repetition day.

This means that over a three week cycle you will deadlift “heavy” once followed by a week of “speed” or lighter work and finish with a “repetition” or volume focus.

This is something that can work really well added into an existing program, and many variations can be used of this.

My advice in using this program would be;

Day 1: Lower (deadlift)

Day 2: Upper Body

Day 3: Lower (squat)

Day 4: Upper Body

*Even if you’re a crossfit athlete this is a simple way to cycle it through, adjusting metcons accordingly/ or add it in where it fits best.

Week 1: Heavy
Deadlift
5 x 2 @ 85%

Deficit (2’) Deadlift
5 x 3 @ 65%

GHR
3 x 10

Back extension (weighted)
3 x 15 (2 count pause at the top)

Week 2: Explosive
Deadlift
8 x 3 @ 60% (+15-20% bands or chains)

Pause (2” off floor) Deadlift
5 x 5 @ 65%
Belt Squat
4 x 8

Pull ups
50 total reps

Week 3: Volume
Deadlift
3 x 10-12 @ 70%

Block Pulls
3 x 3 @ 80%

Belt Squats
4 x 15

GHR (weighted)
3 x 5

Week 4: Heavy
Deadlift
3-4 x 2 @ 90%

Deficit (2”) Deadlift
4 x 4 @ 65%

GHR
3 x 10

Back extension (weighted)
3 x 20 (2 count pause at the top)

 
Week 5: Explosive
Deadlift
8 x 3 @ 70% (+10-15% bands or chains)

Pause (2” off floor) Deadlift
6 x 3 @ 70%

Belt Squat
4 x 8

Pull ups
50 total reps


Week 6: Volume
Deadlift
3-4 x 6-8 @ 80%

Block Pulls
4 x 3 @ 84%

Belt Squats
3 x 15

GHR (weighted)
3 x 5

Week 7: Heavy
Deadlift
1 x 2 @ 90%
1 x 1 @ 92.5%
1 x 1 @ 95%
1 x 1+ @ 80% (AMRAP)

Deficit (2”) Deadlift
3 x 5 @ 65%

GHR
3 x 10

Back extension (weighted)
3 x 20 (2 count pause at the top)

 
Week 8: Explosive
Deadlift
8 x 3 @ 75% (+10-15% bands or chains)

Pause (2” off floor) Deadlift
6 x 3 @ 70%

Belt Squat
4 x 15

Pull ups
50 total reps


Week 9: Volume
Deadlift
3-4 x 4-6 @ 85%

Block Pulls
3 x 3 @ 88%

Belt Squats
5x 12

GHR (weighted)
3 x 5

horizontal_logo_print-ai-01
 

What’s in your Program?

Screen Shot 2016-01-04 at 8.47.20 pm

No matter the goal the variables below are a must in your training program.

Instagram: @ascension_performance_labs / @cam.j.burnside

Facebook: Ascension Performance Labs

Here are some of the most common terms in S&C defined.

Volume
This is how much work you have done or about to do for a specific exercise, session, block, or year. It is usually defined as sets and reps for a specific exercise, group of muscles, or session. Weight/tonnage is also factored in. For example, if you Deadlift 100kg 5 times, the volume for that set is 500kg. If you do that for 5 sets, the Volume/Tonnage would be 2500kg.

Intensity
This is defined as the amount of weight you can lift in relation to your 1-rep max (The maximum weight you can lift on a particular exercise). E.g. If you can Squat 100kg for your 1-rep max, and you lift 75kg for your first set, the intensity for that set is 75%.

This is an essential component to program design and implementation. Without this data you are exercising and not training.

Tempo
This describes the timing of three different phases of a lift/rep. Eccentric, Amortisation, and Concentric phases. This is expressed as three numbers.
E.g. 4-1-2. To perform a squat with this tempo, you would lower yourself to the bottom of the squat over 4 seconds, pause for 1 second in the bottom of the squat, and then stand up for 1 second.

Absolute Strength
This is the maximum amount of force that your muscles and produce in single contraction under involuntary conditions. It is extremely difficult to achieve in normal settings, including 1-rep max attempts. Absolute strength usually appears in life or death situations.

Maximum Strength
This is the amount of force your muscles can produce under voluntary conditions. This is most commonly measured through 1 rep max testing.

Relative Strength
This is the maximum amount of force your muscles can produce under voluntary conditions in relation to your body mass. E.g. you have two athletes. One weight 85kg the other weighs 77kg. The 85kg athlete can squat 200kg, the 77kg athlete can squat 190kg.

The 85kg athlete can more weight showing that they have more maximal strength (squatting 2.35 times their bodyweight) whereas the 77kg athlete squat 2.47 times their body weight, producing more force relative to their body weight.

Rate of Force Development
The speed you can reach max strength/force production. The faster your RFD, the more powerful you are. This is crucial to almost every sport.


Note: Obviously these may not always be present in every training session but these are some foundations that training is built upon.

Pause Squats: Worth it or Wasteful?


12630968_10153965852415739_1511783430_o.jpg

It is worth it. It is as simple as that.

Facebook: Ascension Performance Labs

Instagram: @ascension_performance_labs / @cam.j.burnside

With the advent of modern strength and conditioning, the options for use for these marvelous inventions are ever expanding, especially for the humble squat. From grip, bar position, and stance, to adding chains, bands and boxes, the squat has near limitless modification options. However, there is one modification that I find myself returning to and programming on a regular basis for all of my athletes; the pause squat.

This simple modification is adding a pause or a stop at the bottom range of a squat i.e. below parallel (N.B. It is not bad for your knees. IF you squat like shit it is bad for your knees. I don’t want to get bogged down by the logistics of squat depth in this conversation. That is a topic for another blog).

You can perform any type of squat with this modification of the timing variable: overhead, kettle bell, dumbbell, goblet, front, back, etc.: my personal favourites being the latter two. With whatever squat variation you are using, using good form, you squat to your bottom range, maintain your balance and stability (tension/”core activation”) and come to a complete stop. It is at this point you choose the amount of time you pause. Between 1-3 seconds you can still make use of the muscles’ stretch-shortening cycle, however if you pause any longer (e.g. 4 – 7 sec) you will completely remove this reflex entirely. The length of your pause should directly relate to your goal, as with any programming choice you make.

Purposes of the pause squat are numerous.

  • Firstly, it helps train rate of force development. As mentioned the before, pauses around 3-5 seconds eliminates the stretch-shortening cycle/reflex and thus you will rely less on the muscles’ elastic properties and use more contractility (generating more force as opposed to momentum).
  • Secondly, pause squatting will improve trunk strength, postural strength, and improve flexibility and comfort in the bottom of a squat. This will also lead to improvements and corrections of movement deficits in squats such as leading with the hips or collapsing the chest.
  • Thirdly, there is a high transferability of training effects to other lifts, in particular, Olympic lifts. Olympic lifts require the athlete to drop extremely low to receive the weight, recover and stand up. Pause squatting replicates the sensation of being “in the hole” and greatly assists in the recovery phase of the lift. On top of that, awareness of balance will dramatically increase. By performing pause squats, an athlete will become highly sensitive to where the weight is transferring to in their feet. This means they will develop a sense of the weight coming too far onto the toes or on the heels and thus be able to correct it. At Ascension Performance Labs, our athletes have seen their Deadlift PB’s dramatically increase by performing pause squats.
  • Finally (for this article only), there is a high transferability of training effects to sports in general. There is a myriad of sports that require explosive force development from a bent-knee position. Think about a rugby player driving forward from the scrum (See Alex’s article for more information on this topic) or perhaps a BJJ fighter using a sprawl and then a take-down. As I have mentioned many times before in this conversation, pause squatting trains your stability and ability to explode out of the sticking point of a squat. Getting better at this means you will become more explosive in sport.

You can integrate and program pause squats as you would normally program squats, however reps above 5 are not recommended. Try 5 sets x 3 reps at 70% with a 3 second pause, or use RPE or auto regulation based on the individual.

To answer the initial question posed at the start of this article once again: Pause squats, worth it or wasteful?

Worth it. It’s cheap and effective. So why wouldn’t you?

Coaching or programming enquiries contact us via Facebook 

For a FREE 6 week squat everyday program check this post: https://ascensionperformancelabs.wordpress.com/2016/09/06/free-squat-everyday-program/

Cam & Chris

horizontal_logo_print-ai-01

FREE Squat Everyday Program

SQUAT EVERYDAY POST.jpg

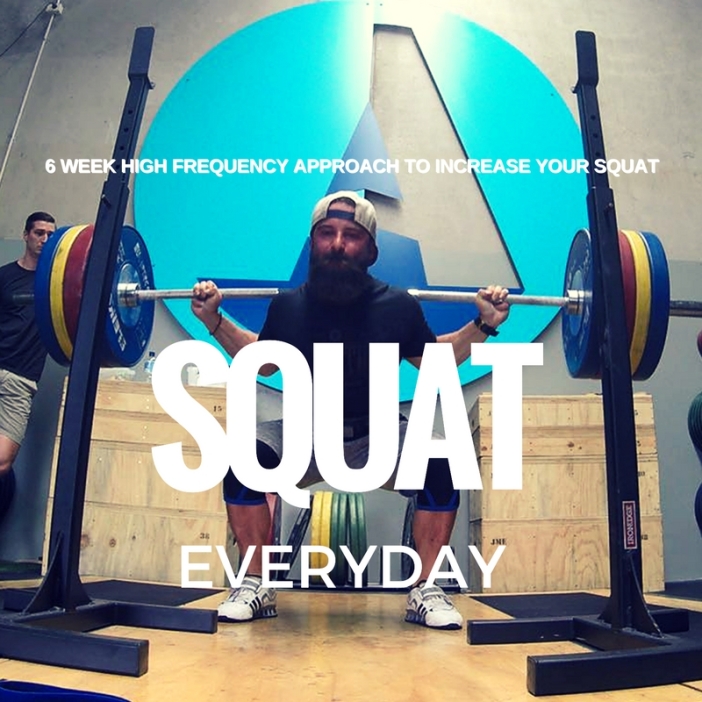
Squat everyday – “Bulgarian style of training.”

Website: www.aplabs.com.au

Facebook: Ascension Performance Labs

Instagram: @ascension_performance_labs / @cam.j.burnside

Arguably one of the most popular training styles going around at the moment. The correct combination of high frequency and high intensity can mean the difference between improvement and overtraining.

Program notes:

This is a 6-week squat everyday program designed to be used in conjunction with regular training (e.g. upper body and lower body days), working to a max daily.

 Squatting everyday has become quite popular in sports such as Olympic weightlifting and powerlifting due to the success some have had with this style of training.

Reasons why this program can work:

  • Increased frequency, therefore increasing practice of the movement and skill acquisition.

  • Handling heavier weight more often, which can increase confidence.

  • Overreaching, this is a variable used in training to cause you to train slightly above your ability in order to achieve maximal return before a recovery period.

 The program undulates from day to day and week to week, cycling variations in tempo / isometrics / lift variation and intensity to allow for progression.

Key concepts:

  • There are 2 waves of 3 weeks within this program; the first wave is focused on TUT and positions, the second wave focuses on intensity.

  • This would be best run in conjugation with a complete program, also training pull variations and pressing variations.

  • Perform Hip / Thoracic mobility daily.

  • Always keep reps clean, don’t go past the point of technical breakdown.

  • Understand that not everyday will be a PB and a “MAX” is for the day not an all time max, make smart weight jumps.

  • Warm up is critical and making quality jumps in weight is the key, use a belt unless it says beltless.

*Work up to a “Daily Max” or new PB every session

Wave 1

W1 D1:

Squat x 1 @ 7:0:X (Drop 10% x 1 x 2)

W1 D 2:

Front Squat x 1 @ 3:1:X (Top single only)

W1 D 3:

Squat x 3 x 3 @ ~60%

W1 D 4:

Squat x 1 @ 3:7:X (Drop 10% x 1 x 2)

W1 D5:

Squat (Beltless) x 1 (Drop 20% 2 x 3)

W1 D6:

Front Squat x 1 (Drop 20% 2 x 3)

 W1 D7:

Body Weight Squat x 100

W2 D1:

Squat x 1 @ 5:0:X (Drop 10% x 1 x 2)

W2 D 2:

Front Squat x 1 @ 3:4:X (Top single only)

W2 D 3:

Squat x 4 x 2 @ ~60%

W2 D 4:

Squat x 1 @ 2:5:X (Drop 10% x 1 x 2)

W2 D5:

Squat (Beltless) x 1 (Drop 20% 2 x 3)

W2 D6:

Front Squat x 1 (Drop 20% 2 x 3)

W2 D7:

Body Weight Squat x 100

W3 D1:

Squat x 1 @ 3:0:X (Drop 10% x 1 x 2)

W3 D 2:

Front Squat x 1 @ 3:7:X (Top single only)

W3 D 3:

Squat x 1 x 8 @ ~60%

W3 D 4:

Squat x 1 @ 2:7:X (Drop 10% x 1 x 2)

W3 D5:

Squat (Beltless) x 1 (Drop 20% 2 x 3)

W3 D6:

Front Squat x 1 (Drop 20% 2 x 3)

W3 D7:

Body Weight Squat x 100

*Work up to a “Daily Max” or new PB every session

Wave 2

W4 D1:

Squat (beltless) x 1 @ 3:0:X (Drop 10% x 1 x 2)

W4 D 2:

Squat x 1 @ 5:0:X (Drop 10% x 1 x 2)

W4 D 3:

Squat x 1 @ 2:10:X (Top single only)

W4 D 4:

Pin Squat x 4 x 3 (Ascending weight)

W4 D5:

Squat x 3 x 3 @ ~50-70%

W4 D6:

Squat x 1 (Drop 10% x 1 x 2)

W4 D7:

Body Weight Squat (Optional)

W5 D1:

Squat (beltless) x 1 (Drop 10% x 1 x 2)

W5 D 2:

Squat x 1 @ 4:0:X (Drop 10% x 1 x 2)

W5 D 3:

Squat x 1 @ 2:10:X (Top single only)

W5 D 4:

Pin Squat x 3 x 4 (Ascending weight)

W5 D5:

Squat x 3 x 3 @ ~50-70%

W5 D6:

Squat x 1 (Drop 10% x 1 x 2)

W5 D7:

Body Weight Squat (Optional)

W6 D1:

Squat (beltless) x 1 (Drop 10% x 1 x 2)

W6 D 2:

Squat x 1 @ 3:0:X (Drop 10% x 1 x 2)

W6 D 3:

Squat x 1 @ 2:10:X (Top single only)

W6 D 4:

Pin Squat x 6 x 2 (Ascending weight)

W6 D5:

Squat x 3 x 3 @ ~50-70%

W6 D6:

Squat x 1 (Drop 10% x 1 x 2)

W6 D7:

Body Weight Squat (Optional)

Test you max back and front squats the coming week.

LAB REPORT-365 #66 Importance of Weak-Point Training

🎓 📝 LAB REPORT-365 📝 🎓
#66 Importance of Weak-Point Training

13320000_1004365779649268_2861428080149684665_n.jpg

While the majority of good strength programming is developed around the 3 main lifts – squat, bench and deadlift – the importance of incorporating weak-point training into yours or your athlete / client’s programming cannot be ignored. What exactly do we mean when we refer to weak-point training? As coaches we should be screening our athletes or clients in the main movements before we develop any sort of program, in order to identify movement or form deficiencies and what is causing them. Once these deficiencies have been identified, we can incorporate specific movements or exercises to strengthen the weak areas to help counter these problems – this is what is known as weak-point training.

The initial screening can be done in multiple ways, but should include at the very least the squat, bench and deadlift, with the weight dependent on the experience level of the athlete or client. A beginner with no lifting experience may complete reps with a broomstick initially, moving up gradually to a 5RM; while an advanced athlete may comfortably begin with the bar, and move to a 1RM. Regardless, it is encouraged to increase the load to the point where a) your athlete or client is working at a relatively high intensity, and b) there is some form break-down, as it is only at this point that you are able to identify true weak areas. Note – do not push your athlete or client to complete form breakdown where they are unable to even move the weight, as for an initial screening this is both dangerous and a pointless exercise for what you are trying to achieve.

Once you have completed the screening and identified these weak areas, you can then develop a program that includes relevant accessory work to target such areas. For example, if you noticed a loss of thoracic tightness during the deadlift (upper back rounding) you may include some pendlay rows to help address this. While each athlete or client will have specific individual needs and weaknesses, you will no doubt see a common trend amongst a lot of people (particularly posterior chain weakness); as such, having a ‘bank’ of accessory exercises for specific areas and muscle groups to draw upon as needed is important for effective programming.

In summary:

* Always screen your athletes or clients to identify weak-points, regardless of their experience or training age;

* Develop custom programs for each client specific to their needs or weaknesses if you truly want them to progress in strength;

* Most importantly – continue to monitor your athlete or client, and constantly review their main movements for progress in existing weak-points and to also identify any new areas that need attention.

Weak-point training is a constant process, and will need to evolve as the athlete or client’s overall strength increases and different / new problem areas pop-up.

– Callum

LAB REPORT-365 #65 TRAINING AGE AND WHAT YOUR HOLIDAY IS DOING TO YOUR PROGRESS

🎓 📝 LAB REPORT-365 📝 🎓
#65 TRAINING AGE AND WHAT YOUR HOLIDAY IS DOING TO YOUR PROGRESS
Lift Like Jess- Strength Performance Coach

13319967_1004293286323184_5009826486655577977_n.png
Most of us have probably experienced this struggle along our fitness journey. We’ve gone on holidays, came back to training and pretty much sucked. This is called DETRAINING or DECONDITIONING and it is frustrating as hell. I’ve experienced this many times in the first couple years of my career so here’s some facts to help you make an informed decision about the breaks you take!

Many physiological changes start to happen once you stop exercising. Your hearts ability to move blood more efficiently begins to decrease as does your muscles improved ability to utilize oxygen and your body’s ability to metabolize carbs for energy (decrease in fitness). You’ll start to loose gains in muscle fibre size as well as other neuromuscular adaptions (strength and hypertrophy). Any improvements in blood pressure, cholesterol, and blood sugar that were brought on by training will begin to disappear also.

How quickly detraining happens once you stop exercising depends on many factors such as age, how fit you are, how long you’ve been training, what type of training you had been doing and at what level. This is referred to as your “training age”. People who train intensely and have been quite fit/strong for a number of years will experience a much slower process of overall decline in comparison to someone with a younger training age.

According to the American College of Sports Medicine, not training for as little as two weeks can cause complete detraining in some individuals. It can take up to 8 months for people with a higher training age. Most people saw a decline in fitness before strength. How quickly this happens varies from person to person. I’ve seen people that had been training for almost a year, at a recreational level, completely detrain after a 5 week holiday with no exercise and a fair bit of alcohol consumption. I’ve also seen clients that have been training less than a year come back after 5 weeks with noticeable fitness losses and only small strength losses.

The moral of the story is if you’re new on your fitness journey, plan to include some sort of exercise on your holidays if you want to minimize the effects of detraining. The longer you’ve been at it the less you’ll lose. It seems like it takes forever to make these strength and fitness gains and no time at all to lose it. Really, in the first few years, it’s true. Once you’ve put in your miles and converted to a healthy, active lifestyle for a couple of years you will start to reap the benefits more and more and actually NEED the breaks from training whereas people with a younger fitness age generally aren’t lifting at a high enough intensity or frequency to require deloading or breaks from training. Just to clarify, I’m not saying deloading needs to take the form of a flat out break from training but that is another topic. What I am saying is if your goal is to get super fit/strong and maintain it then you better be willing to put in the work. Particularly in the first couple years!

Lift Like Jess- Strength Performance Coach